Wednesday, September 22, 2010
Wednesday, September 15, 2010
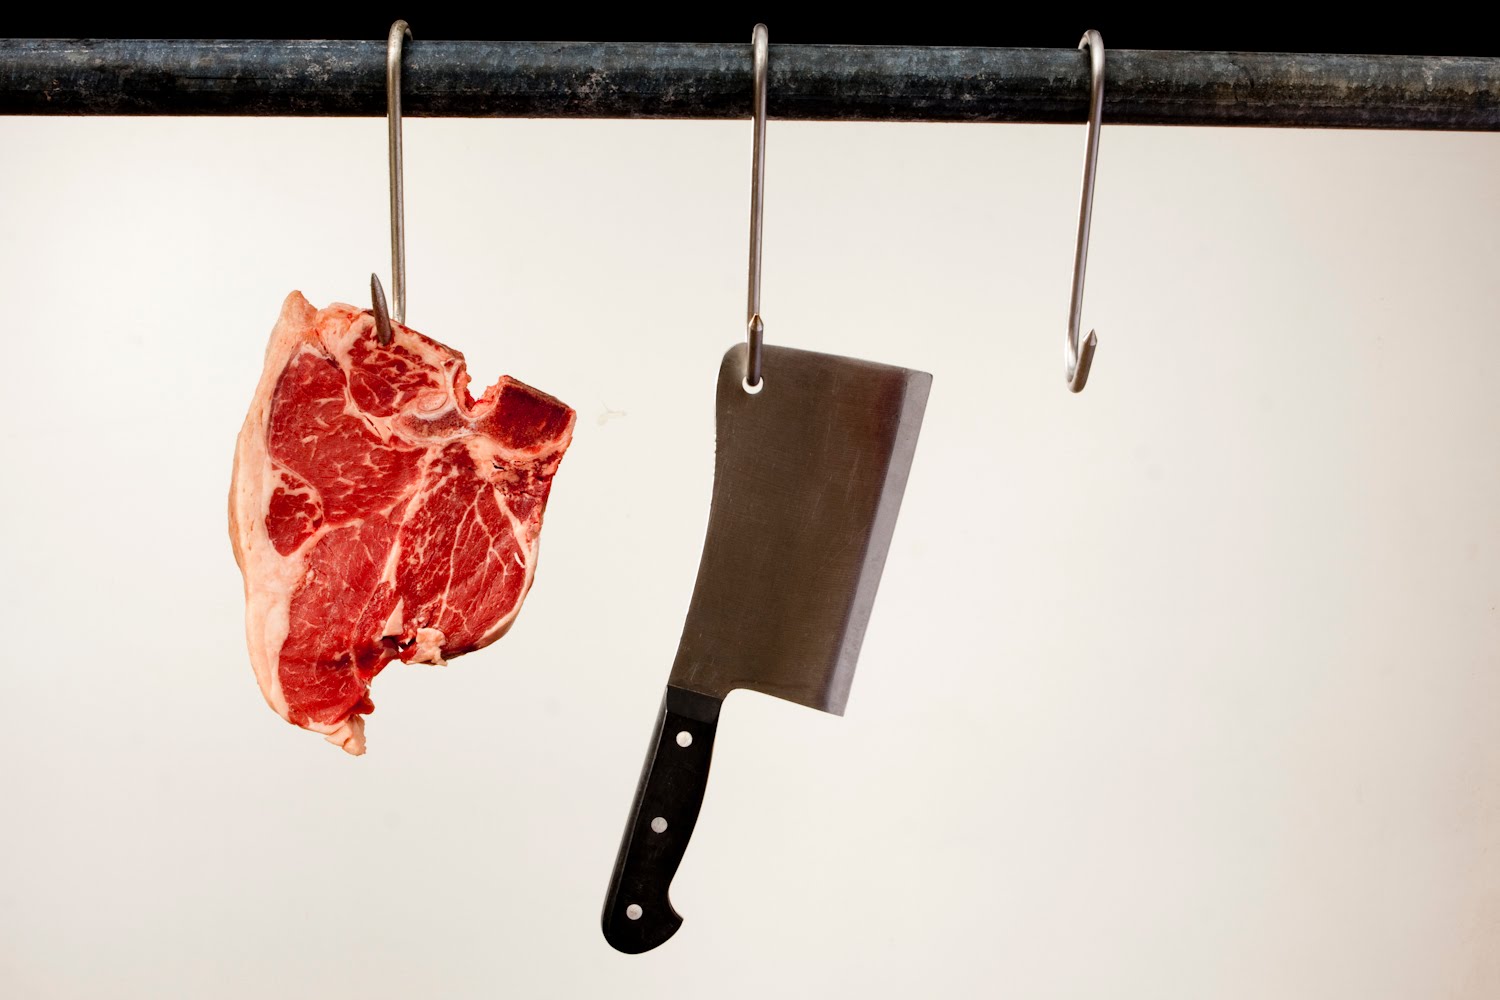
Meat shoots
This shot was shoot in my studio with two studio lights in the middle of the afternoon around 2.30pm. The idea for this shoot, was to show the best of the meat in its environment and then add my twist to it. this where I played around with different back grounds. And added butchers hooks knife and the pole in to the images. Then with the light I over exposed the day light and had a p70 with a grid, as a back light. then the other light was off to the side at a 45 angle to the meat, and then used the sun as the fill light. 


Monday, September 6, 2010
Beetroot shot


Check list
- Camera
- Lighting gear/(2 x P70, 2 x verso packs, 2 x soft boxes on boom, snot, grids medium)
- sand bags
- Book studio
- Beetroot
- Lighting diagram
- Clear the CF Card
- Light meter
- Fishing line
- Hair ties (thanks Tina)
This was a four light set up. With two bron colour power pack (verso).
There was two lights with the p70 reflector with the medium grids to back light the beetroot(f16). There was a large soft box on the back ground (f8- 5.6). The other soft box was over the top of the beetroot, and angle back to the camera to stop the bouncing on to the back(f8). The shot was shoot at ISO 1/125 f8. The I idea of this shoot was to have each beetroot with a different hair cut. There where five beetroot with different hair cut. One beetroot has long hair, one has short hair, one has short hair cut on an angle, one has hair in a pony tale, one has a parted hair.
The back ground was gray to white. I have plains to add spot light in the back ground as a if there are down lights in the back ground, or spots on the back ground.
Problems with shooting. The fishing line that the beetroot was hanging off, would not stop spinning. The leaves on the beetroot where stuck or pinned down with bamboo sticks. So photo shop will be needed to take out the fishing line (maybe I like the lines.) and the sticks.......
Friday, September 3, 2010
Waclaw Wantuch Photography
This is one of one of my all time favourite photographers. He uses light and shadows to control the shape and image that he wont's the viewer to see. these amazingly powerful images are carefully crafted through the use of the lines and curves of the body. The body is sculpts and twisted into theatrical and abstract forms, leaving the the viewer breath taken.
Thursday, September 2, 2010
Acrhitecture
I'm just getting started and I keep finding these amazing images. where dose it stop?www.smashingapps.com/2009/03/22/50-stunning-examples-of-architecture-photography.html
Architectural Photographer
tim@timgriffith.com
steve@steveback.com.au
mail@gollingspidgeon.com
jmillerphotography@mac.com
shannon@shannonmcgrath.com
I have email this email to the following Architecture photographers.
Hi -------------
I’m a student photographer at CIT and one of our assignments is to do some research on the field of photography that we are interested in. My interests are photographing architecture and food.
I have a few questions about working in this industry and I was hoping that you would have the time to answer some of my questions:
· What got you into photography?
· What inspires you?
· Who has been a mentor for you?
· When you are on the job photographing a building, what is your approach?
· How much input does the designer (Architects) have on how you photograph their building and what part of the building to photograph?
· What has been your favourite building to photograph thus far?
· What is the one thing that you are criticised for in you work as a photographer?
· One last question, as a new photographer to this industry, what would you advise to me to help me get into the industry?
Thank you very much for your time, as I know that you must be busy.
I also have some of my images up on my website and I would appreciate some feedback on them, if possible.
Cheers
Nathan Lanham
nlp - nathan lanham photography
www.nathanlanham.com
0402 849 600
Alan Benson


Alan Benson
Alan is a Sydney based food and travel photographer. Living in Sydney, Alan has his own studio and gets to travel the world to photograph the food culture of our world. His photographs are used for publisher and food lifestyle books.
Alan is a Sydney based food and travel photographer. Living in Sydney, Alan has his own studio and gets to travel the world to photograph the food culture of our world. His photographs are used for publisher and food lifestyle books.
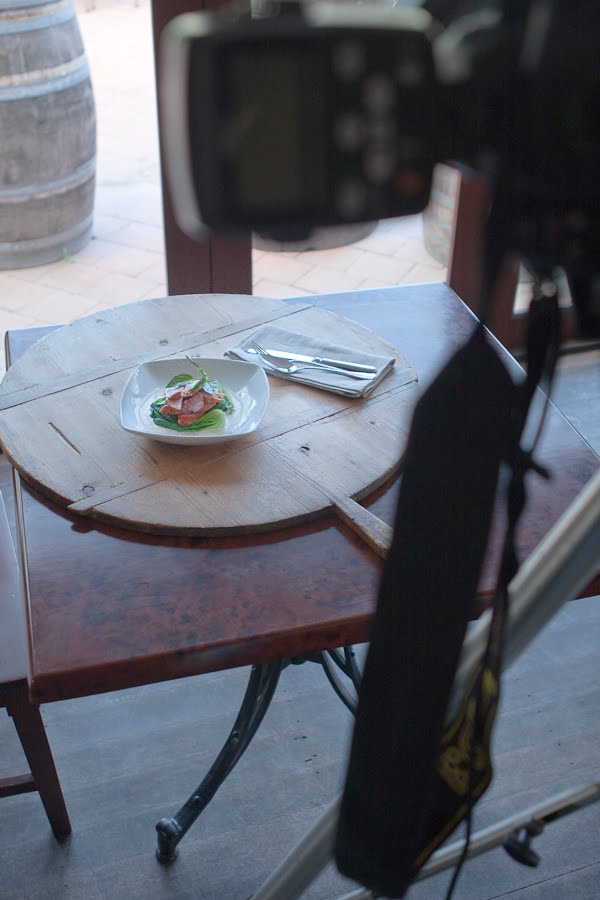
As a third year student at CIT, we got a great opportunity to spend a day with Alan, as he was in Canberra photographing at Poachers Panty in Murrumbateman. The photo shoot was for the branding launch for Poachers Panty, who now are marketing their smoked meat to the IGA Supermarket chain. The food photo shoots where to be used for the recipe cards that will be available in the IGA Supermarkets, located next to the smoked meats. Also on the day, there were some lifestyle shots taken, which will be used on their website. There were raw food products that have been shot for deep etching and these will be used with their design to remarket the brand -Poachers Pantry.
We arrived at Poachers Pantry around 9:30am and Alan was already in full swing with his work. The aim for the day was to get 6 food photographs and some lifestyle shots of talents enjoying the food on a sunny day to give a ‘summer feel’ to the photographs. This was going to be interesting, as it was a very cold winter’s day in Canberra!
Some of the equipment that I notice was brought to the shoot were:
Some of the equipment that I notice was brought to the shoot were:
1. Mac book laptop that Alan was shooting tethered to.
2. Nikon D3 with a range of lenses: Tilt shift 85mm, f2.8 /85mm, f1.8/70-200mm and f2.8.
3. The software that Alan was using was Light Room.
4. Black cards to block light. Reflectors and defuses to defuse the sunlight or flashlight.
5. A tripod was used for all the food shots. The tripod had a cable release.
6. Speed light for the Nikon, with a warming gel.
7. Lots of textured wooden doors, props and cutlery.
8. Glass bricks to shoot the flash through (nice effect).
The main food dishes were all photographed by natural light. When speaking to Alan about the light, he said: “there is always the problem with having too much available light. I like to have light that is coming from one direction. That is why I use the black card to flag off the light in order to control the light falling on the food.”
Alan’s method for the day was that he would get ‘mock up’ dishes to test the lighting first. Alan would light the dish perfectly and then build the set, piece by piece. This is where Alan would construct the images by adding more light or removing light and by adding textured boards and props (like napkins and glasses to enhance the photograph). The designing of the shot would also then help the designer who had a concept of where the images were taken and how they are to fit into their marketing plan.
Alan would mostly photograph the food from a high point, angling the camera down to the food. By using a shallow depth of field, you could easily be attracted to the food first in the photograph. Alan spent a good time making sure that the food was in focus and in shape. He would use the tilt shift at times, to help with the focal perspective.
Alan said: “I would always take more photographs of the food, as this is the safety net that I use. We may have the shot in the first frame, but while the food is there, I will take extra fames, making small adjustments to each frame (like camera angles, depth of field and background changes).
It was great to see how relaxed and patient Alan was on the day, even with a few extra nosey students watching. Great results were quickly achieved. Thanks Alan for the day, which was full of useful insight on how a successfully paid job would go.


Subscribe to:
Posts (Atom)